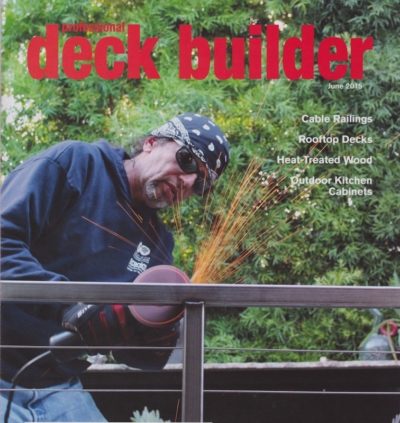
Foolproof Cable Railings
By Tom Salas
 I’ve installed many different types of rail systems in my 12-plus years in the railing business, but my favorite infill by far is cable. It’s maintenance-free, virtually invisible, and a good fit for many different architectural styles, and it will never wear out.
I use cable with all kinds of frame systems, including steel, stainless steel, wood, aluminum, or any combination of those materials. And contrary to popular belief, the cable will never loosen if the frame is properly built. Recently, for example, I returned to a job I had completed more than 10 years ago, and the cables were as tight as the day I installed them. In this article, I’ll share the details I use to ensure that my cable installations are long-lasting and trouble-free.
Wire
Quality type-316 marine-grade stainless steel cable and fittings are now available from several manufacturers (see Resources, sidebar). Most of the time, I install Feeney fittings and its standard 1/8-inch-diameter stainless steel 1×19 cable. I always seem to have a lot of extra cable and fittings in stock, and sticking with one brand helps me to avoid mixing and matching components.
Other types of wire are available. Clients sometimes ask for vinyl-coated cable, for example, but I’ve found that the vinyl breaks down with UV exposure and starts to fade. It’s also not well-suited for direction changes, as the coating will wear away where it exits the post, and it adds labor to the job, since the vinyl needs to be neatly cut back to install the fittings. Clients sometimes ask about galvanized cable, too, because it’s less expensive, but I don’t recommend it because it will eventually start to corrode.
I don’t often install 1/4-inch-diameter cable, because it’s considerably more expensive than 1/8-inch-diameter cable. For commercial jobs, though, where posts are typically bulkier, the heavier cable looks better and is more rugged when people start climbing on it. It’s also useful for trellises, where the spacing is farther apart—typically 12 to 24 inches on-center—and lighter cable just doesn’t look right.
I use a simple stainless steel cable cutter to cut the 1/8-inch-diameter wire to length (you’ll ruin standard wire cutters if you try to use them to cut stainless steel cable). For final trimming, I use a right-angle grinder equipped with a Hilti metal cutoff wheel, since cable cutters won’t trim close enough to the fittings to accommodate the end caps.
Fittings
 Feeney’s cable comes pre-cut with a threaded stud at one end and a swageless fitting at the other end. With this system, I don’t need exact cable measurements and can simply order the pieces a little long (the cable comes in 5-foot increments), then trim the cable to fit. Not only does this expedite the installation, since I don’t need to build the frame before ordering the cable, it also means that I can use 3/16-inch-diameter holes rather than the 5/16-inch holes that are required to accommodate the studs for cable with pre-attached fittings. To my eye, the larger holes just don’t look as good.
When cable can’t pass through holes drilled through a post—such as when the post is attached to the house, or at an inside or outside corner—I use surface-mount fittings. These fittings allow the cable terminations at these locations to stay on the same plane, rather than requiring slightly offset holes.
Swaging isn’t difficult, however, and I sometimes cut my cable to length and attach the terminations on site. This is useful when there are many changes in direction, which would otherwise require a lot of short runs and a lot of fittings (the most expensive part of a cable assembly). I can string the cable through small, 3/16-inch-diameter holes, swage the terminations, and then tighten the cable from both ends.
Swaging sometimes makes the stud curve so that it looks a little like a banana. It can be easily hammered straight again with a rubber mallet, but I don’t think swaged fittings are as attractive as pre-attached terminations.
Posts
The most common cable-rail problem I’ve seen occurs when someone tries to convert a conventional balustrade with 4×4 wood posts, 2×6 top rails, and 2×2 pickets to a cable rail by removing the pickets, drilling the posts, and installing a cable kit. Because the compression created by the cables bears on the top rail, the post-to-rail connections, and the outermost posts, the outer posts will bow inward over time from the pull of the cables, even if the posts are well-attached to the framing and meet code. This will lead to an endless cycle of retightening cables and more post bowing.
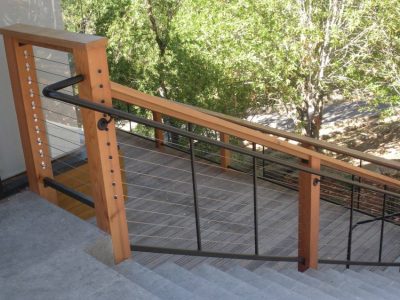
When properly installed, however, wood posts are just as effective as metal posts, and I think no rail is more beautiful than a clear redwood or red cedar post system with cables. I won’t install cable on a 4×4 post, however; the posts must be 6×6 or 4×6, with the long dimension parallel to the cables.
I try to stay away from existing posts, and will use them only when they meet my specifications and I have verified that they’ve been properly installed. Most of the time, I install the posts myself, largely because their location is more critical with cable rail than with conventional rail systems. Posts are always required at cable direction transitions, for example, such as at the top or bottom of a stairway.
In my area, where decks are sometimes relatively small, I often use fascia-mounted posts to gain a little extra useful deck square footage, lag- or through-bolting the posts to the framing with 3/8- or 1/2-inch-diameter stainless steel bolts. At a minimum, the fascia must consist of double 2-by framing so that there is at least 3 inches of thickness of framing material (decorative fascia doesn’t count toward this total thickness). I use two bolts per post for 36-inch-high posts, and three bolts per post for 42-inch-high posts, and shim them plumb with stainless steel washers or sometimes with coins of varying thickness, which will compress into the wood.
Posts can also be located inside the rim joist, of course. When laying the posts out, I try to limit the span between them to no more than 6 feet, with no more than 3 feet between intermediate pickets. I also like to locate posts where there are joints between two deck boards, to make it easier to notch the decking around the posts.
Trying to paint or stain a post that has the cables installed is difficult, so I always finish my rail posts prior to installation, regardless of whether they are made of wood or metal.
Metal. Many of my clients prefer metal posts, which are much sleeker at 2 inches square than 6-inch-square wood posts. I buy quantities of Allied Tube & Conduit’s Gatorshield from US Wholesale Pipe and Tube and use either round or square tube to fabricate most of my steel frames. Gatorshield is galvanized, but unlike most galvanized pipe, it has a smooth, multicoat finish that doesn’t need to be washed off or primed prior to painting, and that has proven to be durable and rust-free. I use it inside and out; everywhere, in fact, except near saltwater, where I fabricate my rails from stainless steel.
I don’t fabricate aluminum rail frames, but I often install them. In coastal areas, I use Feeney’s DesignRail system, which can be ordered with isolation grommets to prevent galvanic action between the stainless steel fittings and aluminum rail components (a potential problem near salt water). When mounting and shimming steel or aluminum posts, I always use vinyl isolation pads.
Hybrid post kits. A few manufacturers now offer metal post kits that can be used with cable rail. Like the kits used with conventional rail systems (see “Guardrail Post Kits,” September 2014), these structural posts are designed to be used with composite post sleeves, but they’re also pre-drilled and threaded to accept standard cable terminal fittings.
Rails
While the lateral strength of any rail system depends on the posts and their attachment to the framing, the rails are actually the key to a trouble-free cable-rail installation when the frame is made of wood. Regardless of the species or design of the handrail, I always install a subrail under a wood top rail, typically a 2×4 of a species that matches the handrail and that extends from post to post. The subrail removes the compression loads from the top rail.
I often combine wood and metal in my rail designs, and when I want a wood handrail to have a slimmer profile, I use 1 1/2-inch-square steel tubing instead of dimensional lumber as my subrail. In fact, most aluminum-rail manufacturers have an option for a wooden top rail, and we often add wood top rails to the painted steel and stainless steel rails that we fabricate. Our clients get the best of both worlds: the durability and stability of metal, and the enjoyment of looking at and touching wood.
Installation
Many installation guides recommend drilling 1/4-inch-diameter holes for the cable, then lining the holes with protective sleeves. I don’t like the sleeves, though, so I use a 3/16-inch-diameter bit for 1/8-inch-diameter cable. I think it looks much better running the cable through very small holes. It requires a little more care when drilling the holes, since a 3/16-inch-diameter bit is more likely to deflect than a 1/4-inch-diameter bit, so I always use a jig and drill the holes from both sides of the post. I mainly use sleeves when there is a direction change, so that the cable doesn’t gnaw away at the sides of the hole.
On long runs, I run the cable through intermediate posts, which maintains the 3-inch-on-center cable spacing I prefer to use. Typically, the longest distance between my intermediate posts, which can be either wood or metal, is 3 feet.
Corners. I never turn a 90-degree corner with a single run of cable and a single wooden post. It’s worth spending the extra money to install two runs of cable, mounted from either a single post or double corner posts (required when the posts are fascia-mounted).
I also try to limit my runs of cable to a maximum of about 60 feet, though I sometimes install longer runs, in which case I also install inline turnbuckles to help tension the cable. Between 240 and 280 foot-pounds of tension will be required on each cable to minimize deflection and ensure that the assembly will meet code (the code requirement is that a 4-inch ball not be able to pass through the cables at the center of the span). That’s a lot: A 36-inch-high guardrail with up to 11 cables will have a total tension of 2,640 lb. on each end post, which must be able to support that load with little or no deflection.
A gauge can be used to accurately measure the tension on each cable, but I just pluck the cables as I tighten them and listen to the sound, as with a guitar, and try to get them all in tune. And as I increase the tension, I sight down the end posts to see if they’re starting to deflect (they always do a little bit). I always go through the tensioning process at least twice.
I sometimes use a cordless drill to tighten the fittings. To avoid seizing the fitting and trashing the entire cable assembly, however, I put the drill on its lowest possible setting and go as slowly as I can. I also make sure I have a helper who can shake the cable and monitor tension while I tighten the cable. I can work solo if tightening the cable by hand.
Cost
Material costs for cable rail systems are relatively high. For example, a standard 50-foot length of 1/8-inch-diameter stainless steel cable with the necessary end fittings costs me about $60. But as I explain to my clients, they’ll be avoiding the costs of maintaining a traditional railing—which can be twice as much as the cost of cleaning and refinishing the deck that it’s attached to—for years to come.